How to Achieve the Best Projector Setup
Key Takeaways
- Understand the importance of projector placement and throw distance.
- Optimize your room's lighting and acoustics for the best experience.
- Learn how to calibrate projector settings for stunning visuals.
- Consider mounting options for a clean and professional look.
- Adjust your setup based on your viewing habits, screen size, and audience.
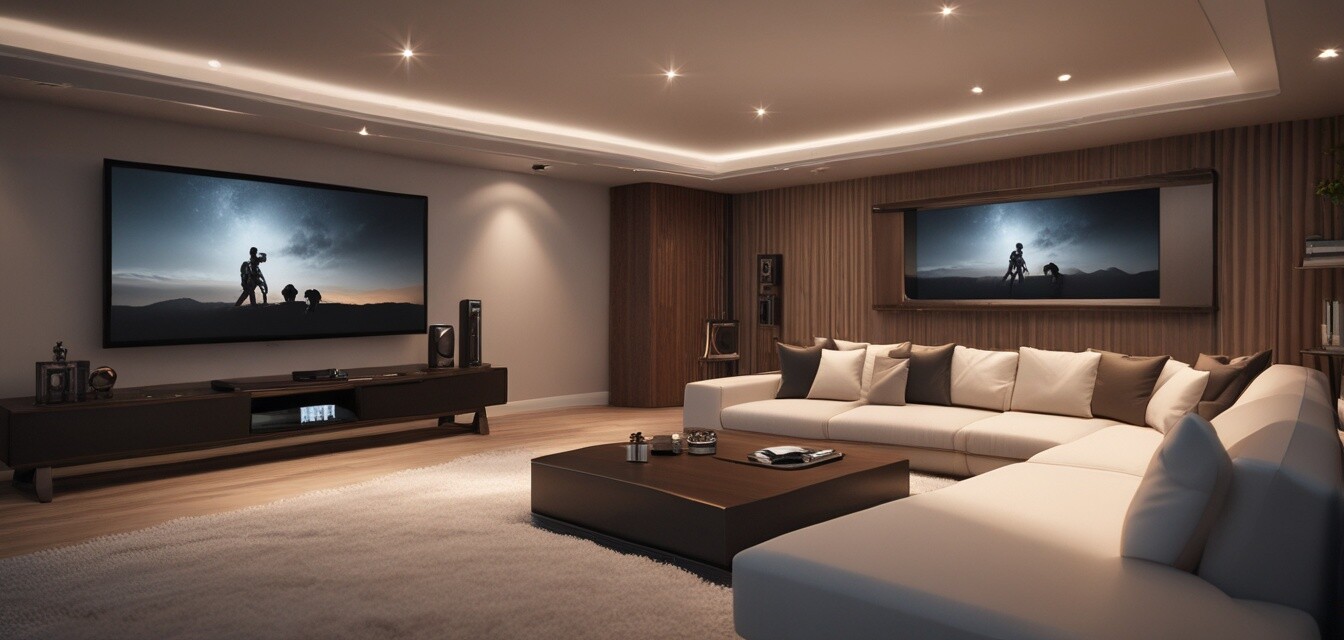
Creating the perfect projector setup is essential for enjoying a cinematic experience right in the comfort of your home. Whether you're watching the latest blockbuster or playing video games, your viewing experience can be greatly enhanced by paying attention to details like projector placement, room lighting, and calibration settings. This guide will take you through the steps necessary to achieve the best projector setup for your home theater. Let's dive into the world of high-quality visuals!
Understanding projector placement
Proper placement of your projector can significantly impact your viewing quality. The following factors are crucial:
- Throw distance: The distance from the projector to the screen affects the size and clarity of the image. Measure the throw distance specified in your projector's manual before installation.
- Screen height: Ideally, the center of the projector lens should align with the center of the screen. This can help in avoiding keystone distortion.
- Ambient light: Consider the lighting in the room when placing your projector. Reducing bright light exposure to the screen enhances picture quality.
Calculating throw distance
To find the perfect throw distance, refer to your projector's specifications. Most projectors have a throw ratio that indicates how far back you can place the projector for a specific screen size. Here are the steps to calculate it:
- Determine your desired screen size.
- Check the projector’s throw ratio.
- Use the formula: Throw Distance = Screen Width x Throw Ratio.
Optimizing room conditions
Room conditions play a vital role in your viewing environment. Follow these tips to optimize yours:
| Room Element | Recommendations |
|---|---|
| Lighting | Use blackout curtains and dimmable lights for control over ambiance. |
| Acoustics | Incorporate acoustic treatments like wall panels to enhance sound quality. |
| Screen Surface | Select a high-gain screen to improve brightness perception. |
Lighting considerations
Managing ambient light is essential for improving the projector's performance. Here are some recommendations for achieving optimal lighting:
- Choose a projector with a high lumen count for brighter pictures in well-lit rooms.
- Install dimmable light fixtures to control brightness during viewing.
- Use shades or drapes to block external light sources.
Calibrating your projector
Once you have set up your projector, it’s time to calibrate it for the best picture quality. Calibration involves adjusting settings like brightness, contrast, and color temperature. Here’s how to get started:
- Use a calibration disk or online tool to help set levels accurately.
- Adjust the brightness to your liking; ensure it complements the room lighting.
- Modify contrast to improve detail without losing highlights.
- Fine-tune colors for more accurate skin tones and vibrant scenery.
Setting optimal configurations
Be sure to consider the following configurations:
- Aspect ratio: Set your projector to match the screen’s aspect ratio for proper display.
- Source settings: Adjust settings depending on whether you're using a Blu-ray player, gaming console, or streaming device.
Pros
- Enhanced movie-watching experience.
- Ability to customize settings for personal preference.
- Increased engagement through improved visuals and sound.
Cons
- Complex setups can take time to perfect.
- Requires investment in quality equipment.
- Room conditions may need significant alteration for optimal performance.
Mounting options
Choosing how to mount your projector is critical for space management and visual performance. Here are some popular options:
- Ceiling mounts: Ideal for saving space and providing a clean look.
- Table mounts: Easier to adjust but may clutter your space.
- Wall mounts: Use for a fixed setup where the projector's location is predetermined.
Installing a ceiling mount
Here’s a brief checklist for installing a ceiling mount:
- Choose a solid ceiling structure to support the projector’s weight.
- Use proper hardware to secure the mount firmly.
- Adjust to achieve the desired angle for projection.
Adapt your setup based on usage
Lastly, tailor your setup based on your usage:
- If primarily for movies, focus on a dark room and large screen.
- For gaming, consider lower latency options and adjust for fast-paced visuals.
- If for presentations, prioritize brightness and connectivity options.
This complete guide to achieving the best projector setup can transform your home theater experience. By implementing these tips on placement, room optimization, settings calibration, and mounting options, you’ll enjoy stunning visuals tailored to your watching preferences.
For more tips on optimizing your home entertainment system, check out our Setup Tips category, or explore our various Projectors & Screens to find products that might suit your needs!